Short Version: I have a good use for some walnut veneer given to me by
Brent Kinsey, a Galoot both skilled and generous. (Others offered too,
thank you!)
Long Version: I am interested in the history of military firearms. (If
you're not, skip down to 'My Project' below.) A fascinating period was
the mid-1800s. Before about 1840, state of the art was almost
universally the smooth-bore musket, usually a flintlock. By 1870,
flintlocks, along with the next generation percussion cap rifles, were a
thing of the past, and the standard was the breech-loading cartridge
rifle. By 1890, breech-loading rifles had undergone several
generations, with the standard becoming the bolt-action rifle. The
classic example of this is the superb Mauser design, which was widely
used through World War II and remains the most common bolt-action
sporting rifle today, almost 140 years later. (Please note I'm a
dabbler, not a true historian, and dates may be off a year or two.)
In addition to the change from muzzle-loading to breech-loading and the
change from flint to percussion cap to cartridge, there was another
sometimes overlooked change: the evolution to a rifle with a central
steel receiver. Before this point, the wooden stock had a structural
role in holding and supporting the mechanism of the rifle. After this
point, the mechanism was enclosed in a metal receiver, and all other
parts connected to it. For a good example of a metal receiver, look on
the internet for 'Martini Henry Rifle' (about 1868) and note that the
rifle has wood from the butt to a metal section in the middle - the
receiver - and that the rest of the wood simply supports the barrel.
As the major world powers considered the change from muzzle-loading to
breech-loading, they were faced with a major problem. Breech loaders
were clearly superior: rather than pouring loose powder and ramming a
bullet into the muzzle, then handling a small, hard to hold metal
primer, the soldier just had to load a single, easy to hold cartridge.
Rate of fire went from 3 shots per minute by the best troops to 8-10
shots per minute. However, most nations had tens or hundreds of
thousands of outmoded muzzle loading arms (USA had over a million): a
major national investment. This lead to the conversion rifles, which
were muzzle-loaders that was altered into a breech-loading
configuration. For example, Britain used the Snider Conversion of the
1853 Pattern Enfield, Sweden used a rolling block conversion, and the
USA used the Allin Conversion of their Springfield muzzle loaders.
My Project
Until recently, I had no rifles in my, er . . collection that were made
before the development of the receiver. That changed a few months ago
when I bought a pile of muzzle loader parts. I rummaged through them and
came to an exciting realization! I had *all* of the metal parts of a
second Allin Conversion breech loading rifle! Unfortunately, I had none
of the wood. In the past, my only project involving firearms had been a
replacement stock for a shotgun, which was under 16" long. Now, I was
faced with something that was likely to be three times as long, and that
had to be shaped as a structural part of the rifle.
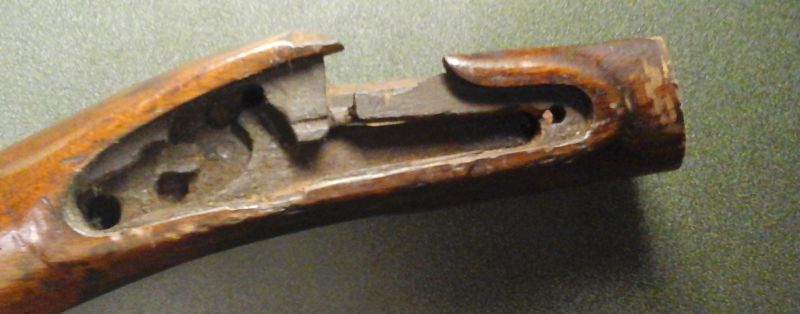
A look at online information left me with the tidbit that a properly fit
musket stock would be within 1/32" tolerance (under a millimeter). A
quick glance into an example of the lock cavity of a borrowed exemplar
stock convinced me that if I started this from scratch as my first
project, it would probably be beyond me. I've enclosed a picture of an
example lock from an Enfield, to give an idea of the mechanism that fits
the cavity.
http://galootcentral.com/components/cpgalbums/userpics/10072/Allin_07.jpg
http://galootcentral.com/components/cpgalbums/userpics/10072/Enfield_01.jpg
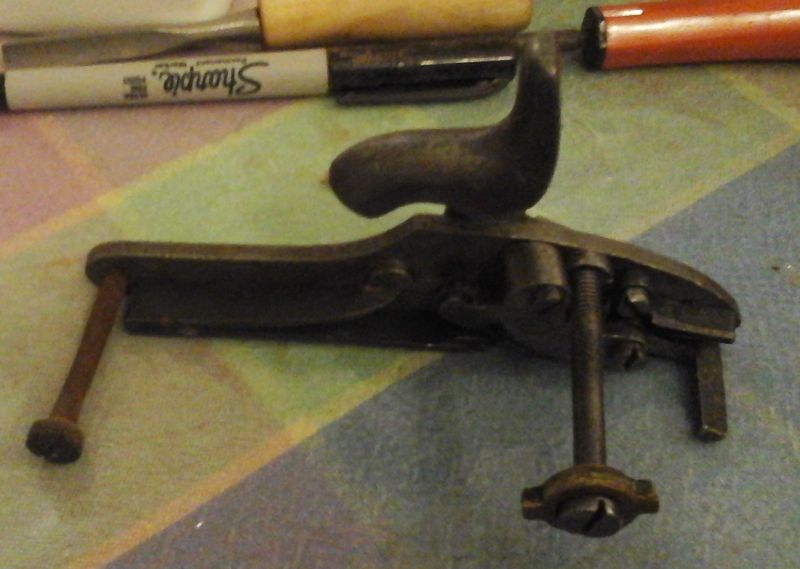
So I went looking for a replacement stock. It turns out that the Allin
is rare enough that replacements are not available. But there are
replacements for the original muzzle loader. Armed (pun intended) with a
replacement stock from Dunlap Woodworking, I eagerly started fitting
parts. To begin with, absolutely nothing fit. Dunlap made all the
channels and cavities undersize to allow for proper fitting. I was able
to fit the lock in first, drilled the holes for the supporting bolts
(called 'nails' in the original terminology) then fit the trigger and
guard.
http://galootcentral.com/components/cpgalbums/userpics/10072/Allin_04.jpg
After that, I started on the barrel. The barrel must be properly
supported by its abutments in the back near the tang, must relate
properly to the lock and trigger, must be supported by the length of the
stock, and line up properly with the forend cap. To fit this, you use a
layout paste: brush the paste on to the barrel, place it onto the stock,
look for paste transfer to the wood, and remove the wood at that
location. Repeat, repeat, repeat ad nauseum. While people who do this
frequently have a special barrel-fitting tool, I made do with a round
rasp, chainsaw file, flat and half-round files, and finally a pair of
tools I got from Tony Seo in the past: 1/4" socket chisel and gouge.
Eventually, I graduated to using dental tools and sandpaper (forgive
me!) . Recently, I got some small chisels from Mark Pfeifer, which would
have been very useful, but by the time I got them, my project had passed
the chisel stage.
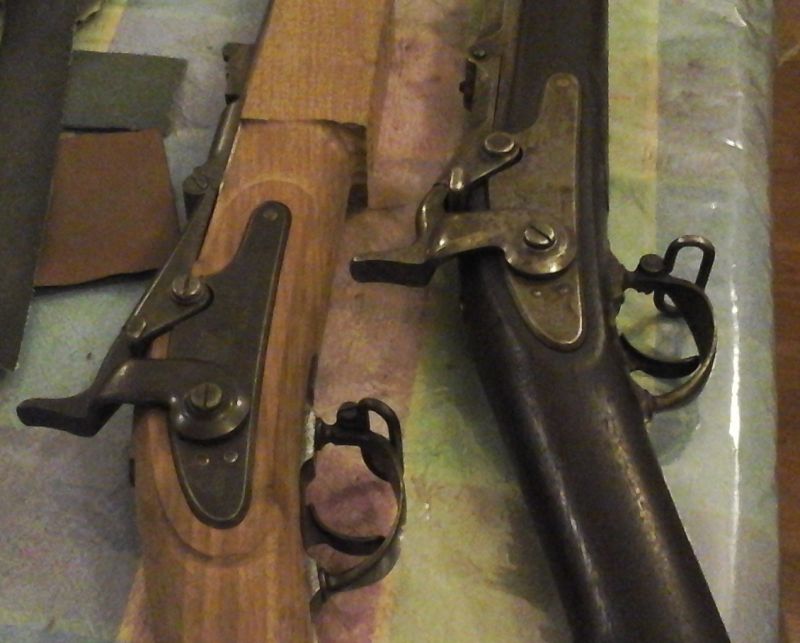
After some hours of work over several weeks, I had actually made a fair
amount of progress. I finally got the barrel to fit in the channel,
then started shaping the stock to fit the barrel bands. This is when I
found that I was in trouble. I had shaved the side walls of the channel
a little lower than desirable for the large band and the middle band.
However, the major problem is that I didn't make the channel at the
smallest band exactly colinear with the other two. I believe that when I
checked the fit at the small band, I let the other end of the barrel
raise up in the channel. I also removed a bit more wood than I should
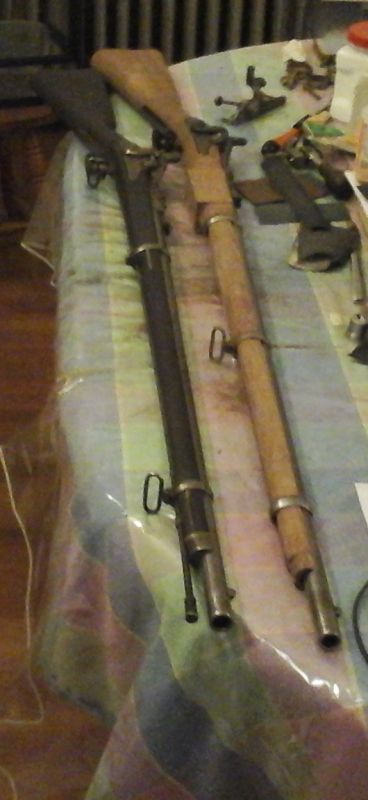
have. At the current stage (next to an example rifle with an early
replacement stock), you can see the project on the right.
http://galootcentral.com/components/cpgalbums/userpics/10072/Allin_01.jpg
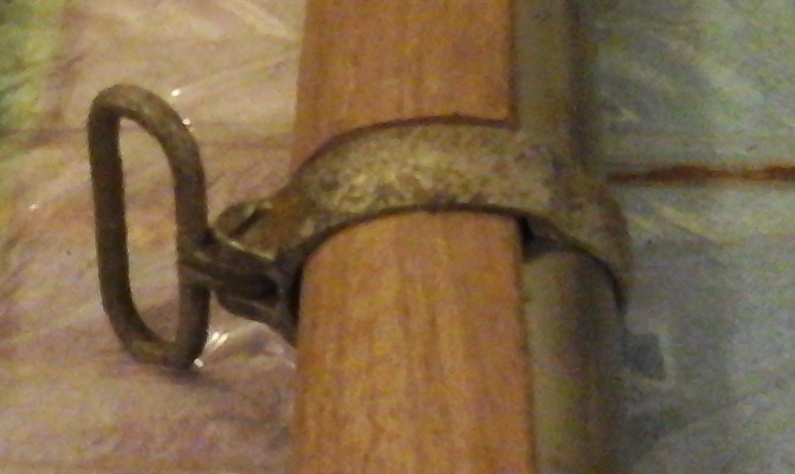
When you look at the middle band, you can see I removed a bit too much
wood. This is mostly cosmetic, since the barrel is bedded firmly in its
channel and the band is snug.
http://galootcentral.com/components/cpgalbums/userpics/10072/Allin_03.jpg
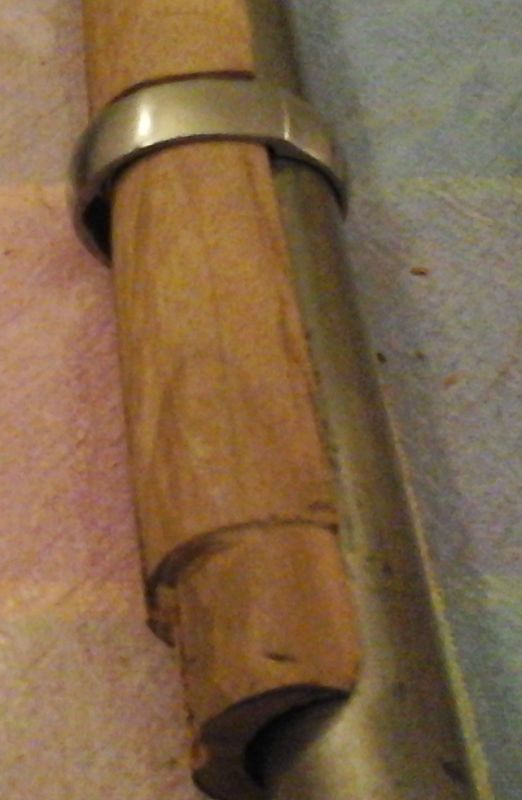
And when you look at the smallest barrel band, You can see I removed too
much wood at several places. The worst is the wood removal between the
barrel and the stock, visible at the bottom. But I also took too much
off around the band itself.
http://galootcentral.com/components/cpgalbums/userpics/10072/Allin_02.jpg
I could hide part of the gap when I put on the forend cap, but if the
pressure of the barrel bands bends the barrel at all, the rifle will
lose its accuracy. I hope to get this rifle shooting within a two inch
circle at 100 yards. That might be ambitious, but if I am to have any
chance at all, I need to have a careful fit throughout.
So, once again having learned that fixes are much easier when I haven't
taken too much off, I will build up the low places with a layer of
veneer, then shave it down to fit. It's been an interesting project.
Next, I hope to do a flintlock from scratch using modern parts and some
walnut I got from Bill Webber.
Live and learn, Gary Katsanis
Albion New York, USA
(hoping our USA Galoots all had a great Thanksgiving!)
|